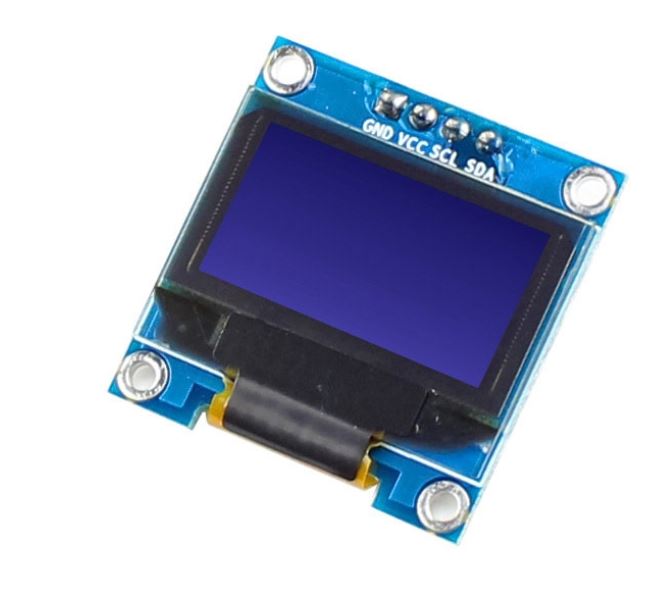
Description
This is a 0.96 inch white OLED display (Yellow- Blue) module. The display module can be interfaced with any microcontroller using SPI/IIC protocols. It is having a resolution of 128x64. The package includes display board,display, 4 pin male header presoldered to board.
Specifications
- Viewing angle : greater than 160 degrees
- Supported platforms : for arduino, 51 series, MSP430 series, STIM32 / 2, SCR chips
- Low power consumption : 0.04W during normal operation
- Support wide voltage : 3.3V-5V DC
- Driver IC : SSD1306
- Communication : IIC, only two I / O ports
- No font : The software takes word modulo
- Back light : OLED self light, no backlight
- Interface: VCC: 3.3-5V GND: Ground SCL: Serial Clock SDA: Serial Dat
Package included:
-
1 x 4pin New 128X64 OLED LCD LED Display Module 0.96" I2C IIC Communicate-White Color
Wiring:
Because the OLED display uses I2C communication protocol, wiring is very simple. You just need to connect to the Arduino Uno I2C pins as shown in the table below.
| Pin | Wiring to Arduino Uno |
| Vin | 5V |
| GND | GND |
| SCL | A5 |
| SDA | A4 |
If you’re using a different Arduino board, make sure you check the correct I2C pins:
- Nano: SDA (A4); SCL (A5);
- MEGA: SDA (20); SCL (21);
- Leonardo: SDA (20); SCL (21);

Libraries
To control the OLED display you need the adafruit_SSD1306.h and the adafruit_GFX.h libraries. Follow the next instructions to install those libraries.
1. Open your Arduino IDE and go to Sketch > Include Library > Manage Libraries. The Library Manager should open.
2. Type “SSD1306” in the search box and install the SSD1306 library from Adafruit.
3. After installing the SSD1306 library from Adafruit, type “GFX” in the search box and install the library.
4. After installing the libraries, restart your Arduino IDE.
Tips for writing text using these libraries
Here’s some functions that will help you handle the OLED display library to write text or draw simple graphics.
- display.clearDisplay() – all pixels are off
- display.drawPixel(x,y, color) – plot a pixel in the x,y coordinates
- display.setTextSize(n) – set the font size, supports sizes from 1 to 8
- display.setCursor(x,y) – set the coordinates to start writing text
- display.print(“message”) – print the characters at location x,y
- display.display() – call this method for the changes to make effect
Write Text – OLED Display
The Adafruit library for the OLED display comes with several functions to write text. In this section, you’ll learn how to write and scroll text using the library functions.
“Hello, world!” OLED Display
The following sketch displays Hello, world! message in the OLED display.
#include <Wire.h>
#include <Adafruit_GFX.h>
#include <Adafruit_SSD1306.h>

#define SCREEN_WIDTH 128 // OLED display width, in pixels
#define SCREEN_HEIGHT 64 // OLED display height, in pixels

// Declaration for an SSD1306 display connected to I2C (SDA, SCL pins)
Adafruit_SSD1306 display(SCREEN_WIDTH, SCREEN_HEIGHT, &Wire, -1);

void setup() {
  Serial.begin(115200);

  if(!display.begin(SSD1306_SWITCHCAPVCC, 0x3C)) { // Address 0x3D for 128x64
    Serial.println(F("SSD1306 allocation failed"));
    for(;;);
  }
  delay(2000);
  display.clearDisplay();

  display.setTextSize(1);
  display.setTextColor(WHITE);
  display.setCursor(0, 10);
  // Display static text
  display.println("Hello, world!");
  display.display();
}

void loop() {

}
After uploading the code, this is what you’ll get in your OLED:

