

Description
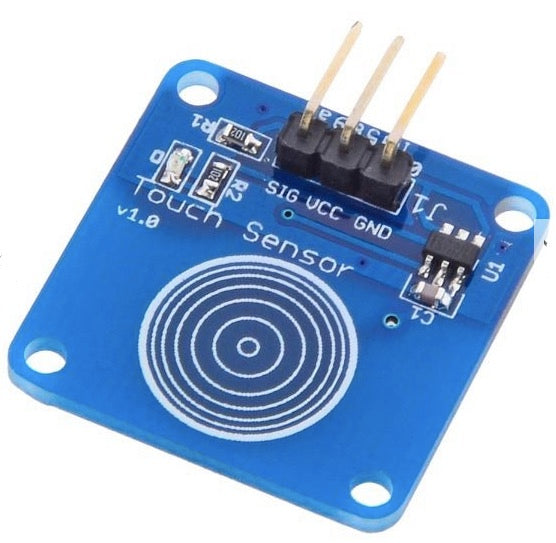
This is jog type capacitive touch switch sensor module based on a touch detection IC TTP223B. Normally, the output is low level(at mode of low power consumption). When the finger touch the corresponding location, output will be high(at quick speed mode). When the module do not be touched for 12 seconds, the mode would switch to low-power mode. It can be installed in the module, such as plastic, glass, non-metallic material surface. But not cover thin sheets(metal) on the surface of the module. Just touch the correct position, it can be hidden in walls, desktops and other parts to be buttons. Allows you to remove the troubles of conventional push-type buttons
Features
Low power consumption
Can replace the traditional key
With four M2 screw holes, easy for operation
Specifications
-
Operating voltage: DC 2.0V ~ 5.5V
-
VOH: VCC 0.8V
-
VOL: VCC 0.3V
-
Sink current: 8mA @ VCC = 3V, VOL = 0.6V
-
Source current: -4mA @ VCC = 3V, VOH = 2.4V
-
Response time: 220ms (at mode of low power consumption) and 60ms (at quick speed mode)
-
Size: 24 x 24 x 7.2mm
Package included:
-
1 x Capacitive jpg type touch sensor module
Usage
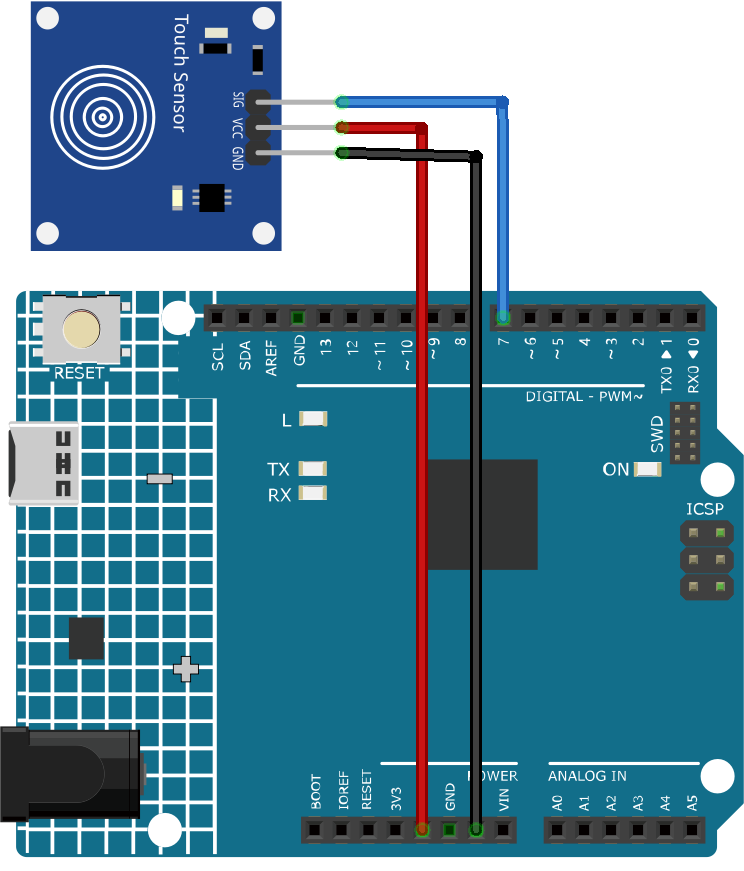
Hardware components
-
Arduino Uno R4 or R3 board * 1
-
Touch Sensor Module * 1
-
Jumper Wires
Circuit Assembly
Code
// Define the pin used for the touch sensor
const int sensorPin = 7;

void setup() {
  pinMode(sensorPin, INPUT);     // Set the sensor pin as input
  pinMode(LED_BUILTIN, OUTPUT);  // Set the built-in LED pin as output
  Serial.begin(9600);            // Start the serial communicatio
}
void loop() {
  if (digitalRead(sensorPin) == 1) {  // If the sensor is touched
    digitalWrite(LED_BUILTIN, HIGH);  // Turn on the built-in LED
    Serial.println("Touch detected!");
  } else {
    digitalWrite(LED_BUILTIN, LOW);  // Turn off the built-in LED
    Serial.println("No touch detected...");
  }
  delay(100);  // Wait for a short period to avoid rapid reading of the sensor
}
Output

Code Explanation
-
Setting up the necessary variables. We start by defining the pin number where the touch sensor is connected.
const int sensorPin = 7;
-
Initialization in the
setup()function. Here, we specify that the sensor pin will be used for input, the built-in LED will be used for output, and we start the serial communication to allow messages to be sent to the serial monitor.void setup() { pinMode(sensorPin, INPUT); pinMode(LED_BUILTIN, OUTPUT); Serial.begin(9600); }
-
Continuously, the Arduino checks if the touch sensor is activated. If touched, it turns on the LED and sends a “Touch detected!” message. If not touched, it turns off the LED and sends a “No touch detected…” message. A delay is introduced to prevent the sensor from being read too quickly.
void loop() {
  if (digitalRead(sensorPin) == 1) {
    digitalWrite(LED_BUILTIN, HIGH);
    Serial.println("Touch detected!");
  } else {
    digitalWrite(LED_BUILTIN, LOW);
    Serial.println("No touch detected...");
  }
  delay(100);
}